Let Me Show You How I Fixed A Broken Hypertufa Bowl
Over this past winter, I had one of my smaller hypertufa bowls crack in half. Well, not exactly half, but you know what I mean. How do you fix a broken hypertufa bowl? This had been asked many times over on the Facebook Group, and I have addressed this previously in a post.
But I thought that I should make a video and show you how I repaired the problem. Have you had to deal with this before? Please let us all know if you have a different way to repair.
I will link some products I use to make these repairs, but you may be able to find them locally where you live. Be sure to read the label and make sure that it says that it will work on concrete or brick. Those two substrates are what I use to define whether or not I think it will work with my hypertufa. ( The links I use are affiliate links and I could get a bit of coin if you go through those links – no extra cost to you.)
What Do I Fix A Broken Hypertufa Bowl With?
I use an adhesive product that is specially made for cement/brick. This had worked for me in the past and I know it will work for this break. Take a look at Loctite PL 500 Landscape Block Adhesive
My hypertufa bowls are outside, therefore in my case, I need to bring it inside to dry out. I remove any plantings inside the bowl and relocate them to another bowl or into the ground. Then the bowl needs to dry thoroughly. The adhesive will best work on a dry surface.

Next I need to brush off the broken edges to be sure they are clean and accept the adhesive I will apply. Using a soft brush, I just clean that inner edge of the broken pieces.
I was lucky that my piece broke in a fairly even line straight across the piece. This type of break is more easily fixed. If you have a break that results in many broken edges and pieces, it may not be salvageable.
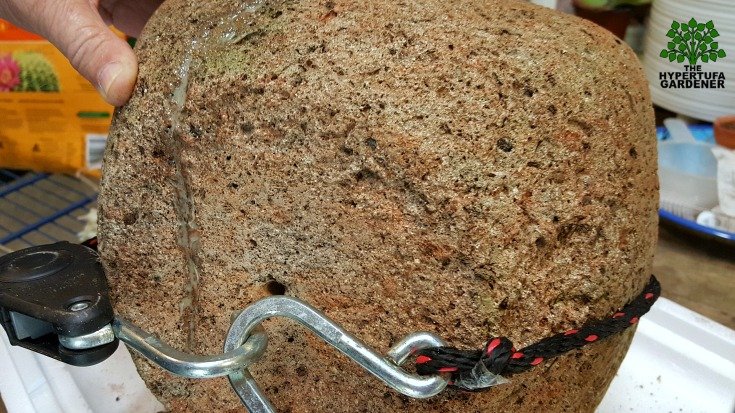
After applying the adhesive and pressing the sides together, I need to secure them carefully during the drying process. I used a pull strap or tie-down strap to do this but you can use whatever is available to you. A strong piece of rope or string could work. Even a tiny bungee cord if it holds securely.

Wait for the required time according to the directions on your adhesive. This Loctite said wait 24 hours and I released it to find that my piece was glued together really well, so you may have the same result.
I can replant the pot just as before, and I would be comfortable putting it back outside, but in my case, I want to make an indoor arrangement with some of my newer tender succulents. But I will have that in an upcoming post and video!
Stay tuned!
Update: This repaired bowl is all planted up now! Check it out!


