
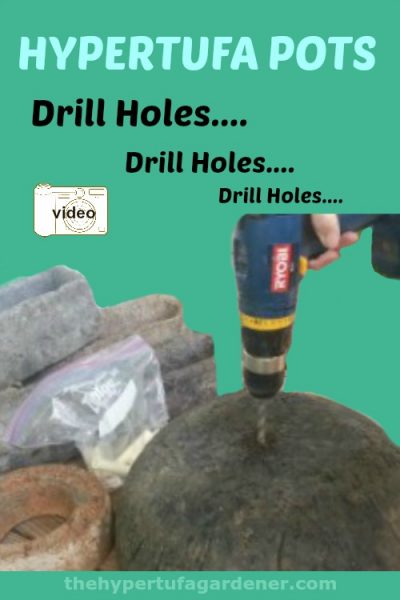
Tufa Times Magazine Hints – Drainage Holes
Hypertufa Planters are known for their great drainage!
But if you make a hypertufa planter, even though the garden planter is very porous, you still need to have drainage holes in the bottom to be sure that the soil does not hold onto water collecting inside. It is most important during the winter season that water drains from the hypertufa pot.
For many hypertufa creators, the best way to get drainage holes in the pot is when you make it. This is done by poking your finger or a wooden dowel into and through the wet mixture at the bottom of your pot.
I have an idea for a “poking rod” that you can use over and over.
It’s made from those pipes from the Big Box store called PVC pipe. It is found in the plumbing section and sold in 8 foot sections. I selected the 1/2 inch size pipe. You can use pieces of this piping to make your holes in the wet mud mixture.
I got an 8 ft section of it for approx $5 and then cut that into 4 inch pieces. My husband used his electric table saw and just zip! zip! all done. I had 24 pieces to use. I keep them all together in a bag and now I have them ready whenever I make a pot. Since they are made of the PVC material, they are easy to clean off and re-use for the next planter.
Just push it down into the bottom of your new planter before you wrap it for the first cure, being sure to go all the way through. You may want to put a little lubricant on it, but it has worked fine for me without. Just push it in, then give a little twist to make sure it is through, and to “round out” the hole.
My opinion: A small pot needs one hole but those larger pots need 3 or more depending on how large they area. I have 8 holes in my largest hypertufa garden planter.
This method will work for you if you like to make the holes during the initial forming of the hypertufa pots.
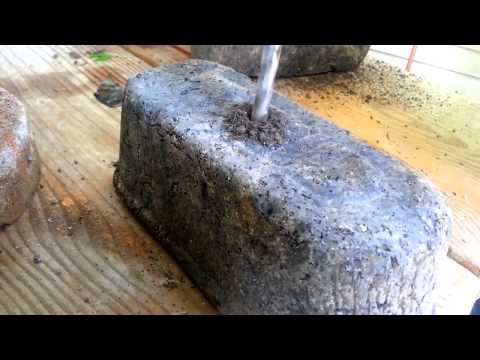
How I Make My Drainage Holes
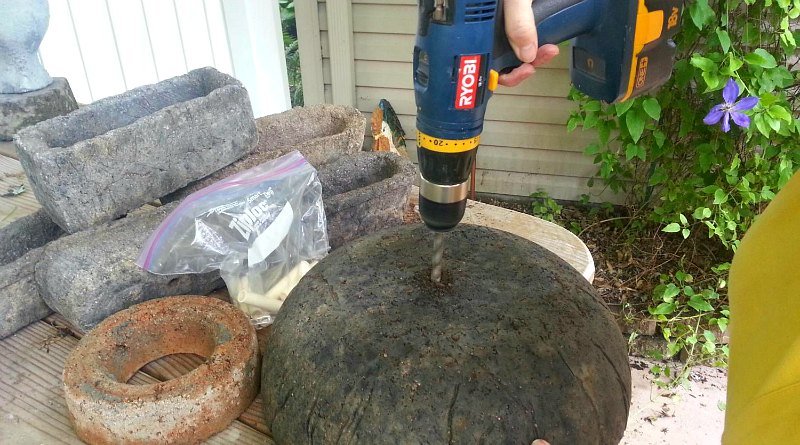
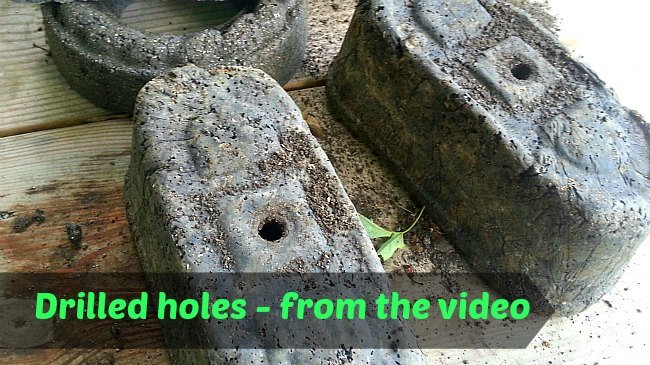
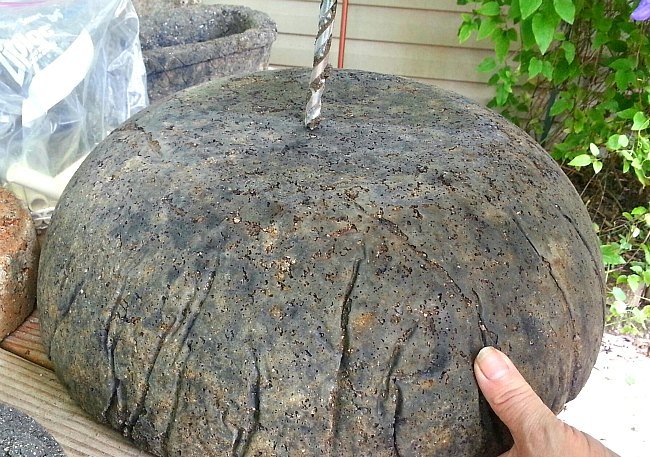
This is how I prefer to do it. Drill holes with a masonry drill after your first cure. It goes through like butter and it is all ready after leaching.
Yes, this is the most fun way of making the drainage holes. Use a drill after the first cure before the final wrap. (You can also drill later. It will just be more like drilling through “rock.”
As an Amazon Associate I earn from qualifying purchases.
I have a set of Drill Bits for masonry that I use. And it is great to have a Cordless Drill to use since they are so portable. One day I want a pink one!
I made a short film showing how I have drilled a few of mine.
You can try either way. Or if you are a “finger poker” then just go with what suits you. As long as you get drainage, it works.
What is your preference? Have you had any problem with either of these methods? And any advice for me on those leaf imprints I show in the video? Maples leaves just don’t have enough prominent veining, right?
Please share this post with your Hypertufa Addicts like me. Just can’t get enough!
Hi Kim,
Somehow i missed and cannot find how you leach the concrete planter before planting in it. Please tell me where i find that info. Thanks!
Veronica
I have another post about Leaching. Here is the link. I hope you find that info useful.
Thanks for sharing so many great tips! Do you immerse the whole pot in water when you drill the holes before drying? If so for how long?
Sometimes I immerse the whole pot, other times just rinse and dump (then drill hole later.) I usually rinse for a week or so. That always seems to do the trick easily.
Hi Kim! I found out about hypertufa’s about a year ago from a friend and was finally able to start making them this year. I am having a blast! Mostly I have been making pots, but made my first draped tufa’s the other day. Sometimes I forget to put holes in the bottom – I have been using the finger method – my husband is a carpenter so I think he can help me with drilling the holes.
Two things I wanted to ask you about…first: I do pretty well with making the outside of the pot look good – I usually line my mold with a plastic bag or I use a cooking spray if I have a mold with a pattern. But, the inside and the rim are usually pretty jagged. I have used one container inside another container, but I don’t always have an appropriate inside container. I kind of like the “organicness” of the finger prints inside and the jagged rim, but no everyone does. Do you have any tips on making things more smooth? Especially the rim. I always think it is smooth, but, when I unfold them they are all jaggedy.
Second: what do you recommend for painting tufa’s? I took one pot that I didn’t like and painted it with my acrylic paints. It actually came out amazingly well. I have been deliberately keeping it in the sun and so far no visabe fading. Maybe I answered my own question. Ha! What about a sealer either on a “natural” tufa or a painted tufa?
Sorry this is so long. Thanks for your help!
Thanks, Barbara. So glad you are making them and I think you are officially an addict now. I paint mine sometimes with acrylics or wood stain. I think it brings out the texture well. Also I don’t think you need to worry about an inner form. Just press it nice with your fingers, and then “file off” any excess when it is dry. Look at this video of mine to see what I mean. https://youtu.be/5gUlLQBoiP4?list=PLBTWHpyo9hIvelQfisDi36RmKXX5HidTn I use the brush and rasp to round of any jagged edges.
Hi Kim, I live is South Africa and made 3 pot’s, The Peat here is very expensive . Is there another alternative to Peat . I found the pot started disintegrating after a year . did I do something wrong????
Hi Hettie, Sorry that the peat is so expensive. It is the cheaper of the ingredients here. But if you have access to coir (coconut fiber), that can be substituted in the same ratio. I have not used it myself. Maybe I will hunt it down sometime just for the experience of using it. Not sure why your disintegrated. Maybe use a little more cement in the mix?
Very cool – this is all new to me – thanks for sharing!
Glad you visited. Try it and you may like it.
These are really neat. Thanks for the directions on making drainage holes. These planters are very interesting to me. I remember seeing them a long time ago on a garden show.
Thanks. And I have seen them on some garden shows several years ago, such as Martha Stewar’s and some British shows that I can’t think of the names just now. Glad you visited.
I’ve never seen this before. Make me wish I had a house to have planters
Thanks, but you can make a small one for a porch or balcony or even a windowsill. I made some with a velveeta cheese box. Cute!
Very neat! I have never heard of this type of planter before. Must give it a try!
They are fun to make, like playing in mud pies like I was a little girl. But the containers are so worth it. Try it. You’ll get hooked!