

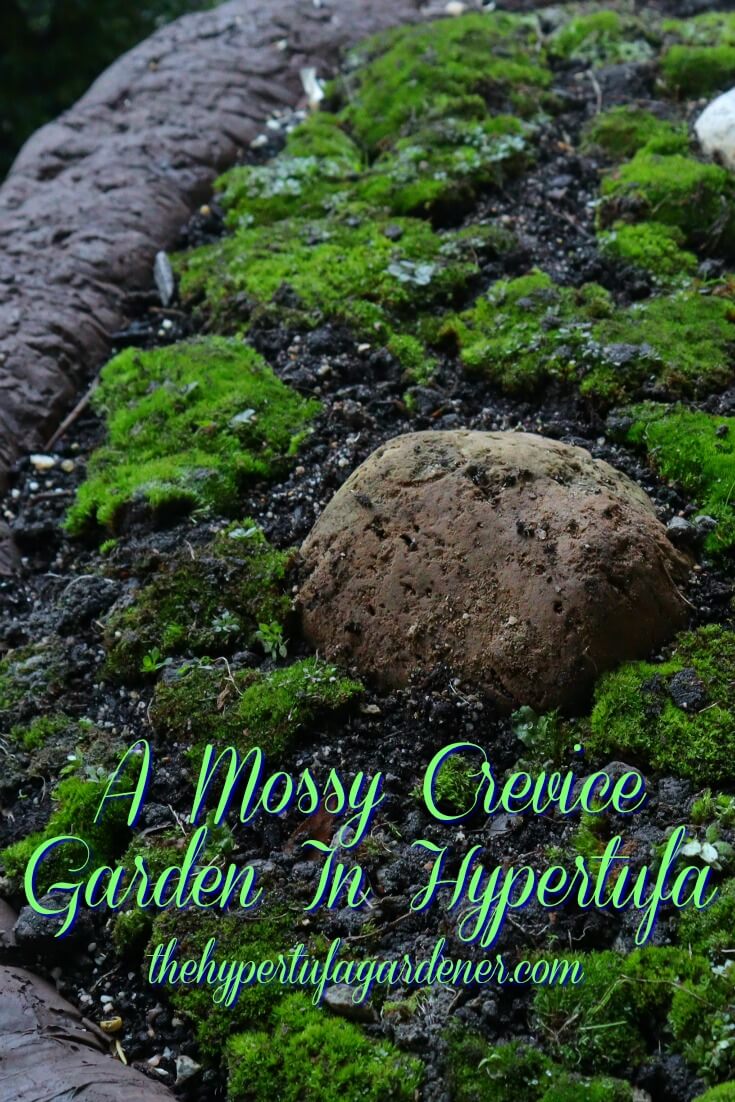
Planting My New Giant Hypertufa – A Mossy Crevice Garden?
If you have been following the saga of the Giant Hypertufa, I am so glad to say that we have planted it up and it is ready for winter. At least as ready as it can get. The decision was to make this one a Mossy Crevice Garden…at least for now. That may change in the spring when I go out to evaluate the front garden. One thing cannot change. The Giant Hypertufa needs to stay put where it is now. Moving it is NOT an option. (Never say never…LOL) This hypertufa will have to stay until it disintegrates in the next century.
I have positioned the hypertufa in a location close to the brick wall where it may get a lot of the warmth of the western sun which hits that area. Being in USDA Zone 6, perhaps I could have that plants survive that are Zone 7 or even 8. Warmth from the sun and brick may allow plants to survive there? I may try a few experiments for that and I will be sure to let you know.
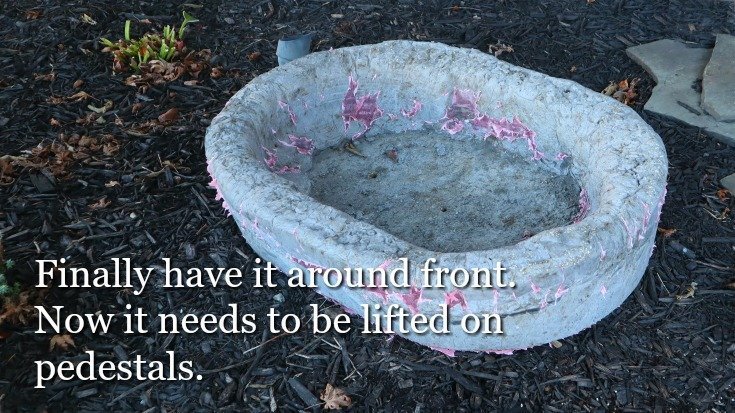
Raising the giant hypertufa on pedestals seemed the best option, so I used the Half Concrete blocks from Lowe’s. They are heavy but seem to work fine. I painted them also.
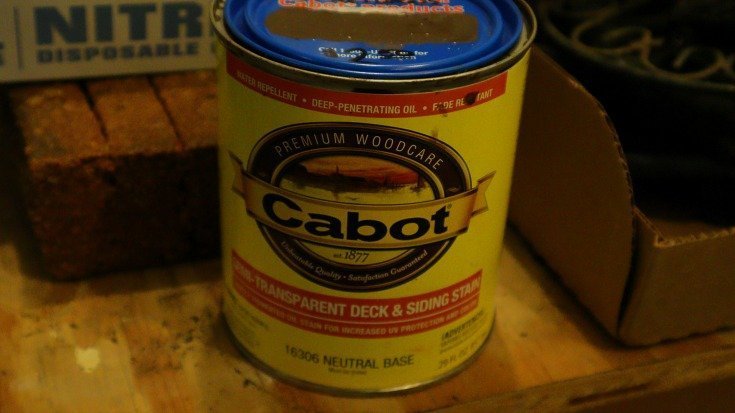
Since I didn’t like the color of the finished trough, I decided to paint/stain it. It seemed to me not so coincidental that I went to Lowe’s just to look over some lighting accessories and went by the “Markdown” section in the paint department. I had thought that I wanted some kind of earthy brown color for the trough, but hadn’t really picked anything out. Right there in the markdowns was a quart of Cabot Deck Stain for $2.50 in an earthy brown color! I checked and that paint sells for $25 originally. It was a sign! Coming home with me!
After hours and hours of working on pulling the pink plastic away from the wrinkles in the sides, we decided to use a rotary brush on a drill to try and remove remnants of it. I have used that on my hypertufa surfaces before and it can and will makes scratches. But those scratches just add to the rustic aura to me as long as I don’t have them all looking like a weird pattern and only on one place on my planter. It worked! Note to self: DON’T USE FLIMSY PLASTIC
Planting A Mossy Crevice Garden
I had the idea to plant it up as another crevice garden since I liked the one I had done previously, but I also likes the idea of a moss garden. I haven’t had one of those at all. But on final consideration, my decision was to combine the two. I will have a mossy crevice garden with as many mosses as I can find and sprinkle small spring flowers in the mix too.

Perhaps in spring I will add some of my selaginella moss that is supposed to be hardy in Zone 6, but I think that based on planting this in October, it would not have time to establish well before cold weather hits. For now, I will use the ones that grow naturally around here on the edges of beds and near my trees will end up being the best to survive.
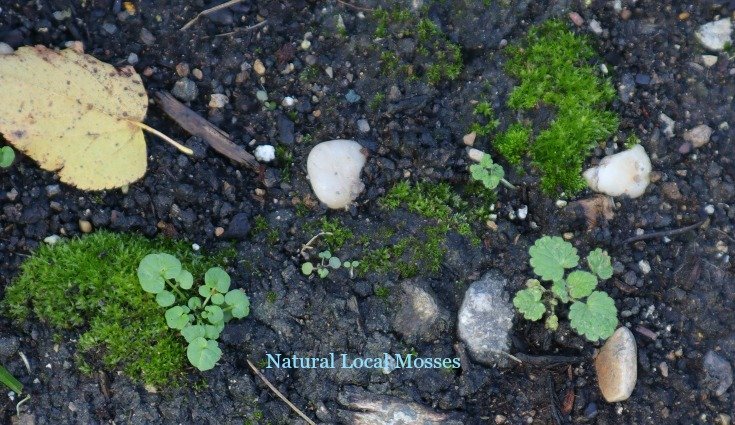
That way I can see if I can grow mosses in such a large area (on purpose) and it will be colorful and pretty for spring. I found liverwort so I including this also. (LIVERWORT marchantiophyta) But that calls for a whole new post soon.
This planter is positioned in front of the house, so those who pass by can see it too. The front garden can use the color pop anyway. I have been seriously considering putting in some shrubbery that is evergreen all year. In my opinion, there are too many boxwood out there and placed randomly. Not my taste.
Be sure to watch the video and let me know what you think. It seems really awesome now and I may reposition the rocks and stones based on where I get flowers in spring. Hopefully most will survive but one can never be sure! Oh, and I made sure I picked up the Anemone Blanda this time so I could be sure of the size. Hmmm…maybe I will bring all the Hypertufa Bulb pots around from the back? Well, maybe not all. The back deck needs to be pretty too!
I do love seeing your creations and then what you do with them. I have moved several of my past containers around to the front of the house, spots where grass just doesn’t grow well. I like the variety of height and planting options by doing this. I now need to find the time to create new ones. Something keeps me from it each time I plan for a morning or evening of hypertufa fun. You keep me inspired though.
Thanks so much, Vickie. I love making them and always try to make a video of how it turns out. So glad you appreciate that. Great idea to put them where grass won’t grow!
Just another little something I learned when using flimsy plastic table cloths from the dollar store as mold liners. I pull up on the table clothes as I am placing the hypertufa in the mold to prevent horizontal wrinkles. So far it has worked for me. I bought so many of them on clearance, I didn’t want to trash them. I had to figure out a way to use them. Hope this helps. By the way, your mossy trough is beautiful.
Thanks. I usually do that but I think this one was a little too flimsy and easily torn. Next time I will be sure to get a bit less flimsy. Thanks so much for stopping by.