
I Needed Plant Saucers! Made A Pair With Hypertufa!
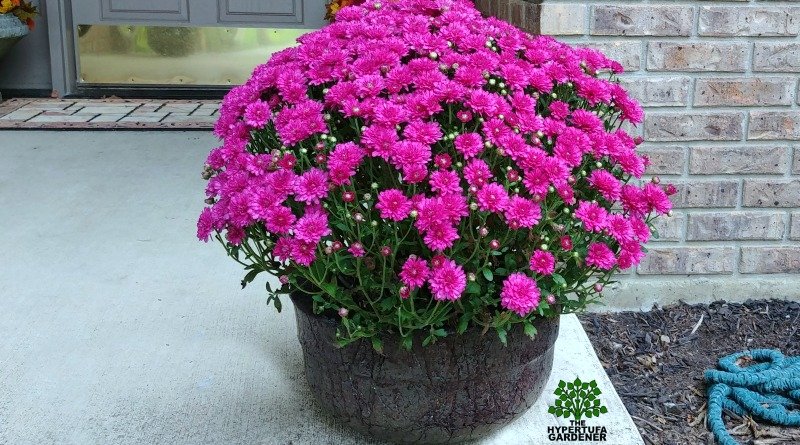
It’s fall and I am putting some pots of mums on my front porch. I really love the color and shape of a large pot of mums, but we know that these flowers use a lot of water since they are so full of buds and flowers even as you purchase those pots.
( Hint: Always buy one which has tons of buds but not many opened flowers yet. That way you get the full advantage of all those opening flowers on your porch or deck.)

Since these chrysanthemums use a lot of water, I need to water them daily to keep them healthy looking. But those pots that they come in from the nursery are small compared to the actual size of that huge amount of flower heads, water is needed daily especially in hot weather and dry periods.
When these pots are set up under your overhangs or porches, little water reaches them naturally, so supplemental watering is a necessity.
So here comes the need for a hypertufa plant saucer! Right? And we know when we are making our own, we can customize the size and shape we want and need. Maybe it is not exactly a saucer, more of a pot insert bowl for that ugly plastic pot when the mums come from the garden center.
I explored my inventory of molds (or as my husband calls them: “Those shelves full of junky plastic containers.”) Hey, those are my gold mines, thank you!
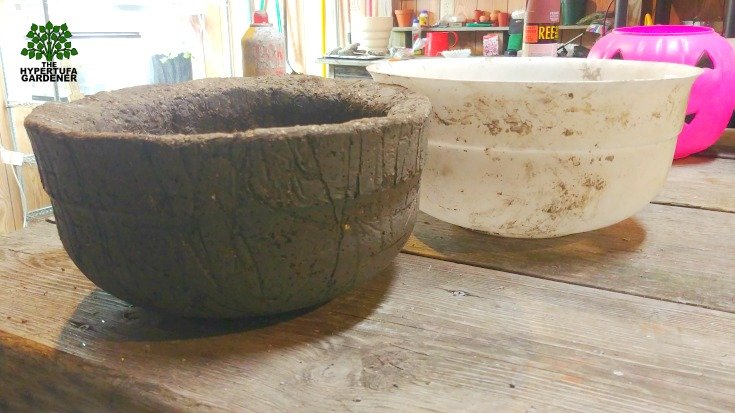
I found a deep round bowl that perfectly complemented my pots of mums. The bowl was about 13″ diameter and stood about 8″deep. It seems the perfect size for these mums. Since they needed to be watered so often, I thought I could put the porous hypertufa under the pots as a saucer/insert combo.
Keeping the mum planted in its little plastic pot from the nursery will keep it undisturbed until I am ready to plant it after all the bloom is over.
Making Hypertufa Plant Saucers

Hint: Don’t throw these mums away after the bloom is over. Keep them watered and plant them in the ground in a good sunny location to come up next year. Most times I can get them to survive and bloom for many years afterwards. Hey, they were pretty this year. Enjoy them for another year or two.
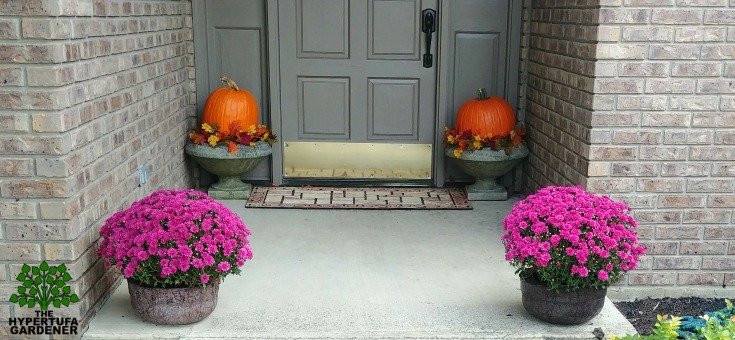
I made these saucers/inserts over a few weeks time. They needed to dry/cure before I could paint them. Plus the fact that I had only one mold and I wanted a matched set. I chose to paint these with a Cherry wood stain.
I prefer wood stain for my cement projects. I want the project to “show through” the color not cover it completely up, but you may want a different look.
I chose not to put a hole in the bottom and try these as plant saucers and allow any accumulated water to slowly drain away via the porosity of the hypertufa. I will watch for a week and drain a small hole if needed.
To me, it needs to stand in water for a short period (such as 60 minutes) to enable the plant to soak up the water since it seems to drain through too quickly in that plastic pot. Especially if that peat-based soil has dried out. The water just won’t reabsorb into the soil unless you use hot water like I did in this post. And I can’t do boiling water in a living plant, right?
Try some of your hypertufa pots as saucers or inserts. If you are a hypertufa addict like me, you have a lot of them to choose from. It’s a good use for them, don’t you think?